Of course you can use this technique anywhere you like not just with a GREYMAN TACTICAL RMP, in-fact I first came up with this method for one of my earliest projects
(You can read about that HERE) This was before I’d discovered the RMP and used. 511 Tactical COVRT Insert.
- FULL DISCLOSURE -
This page contains Affiliate Links, please tap
[DISCLOSURE] for details.
So what hell are we talking about?
Basically a very simple way of making you MOLLE fields and panels more usefully by making them super elastic, shock-cord fantastic! In this way you will be able to organise your rucksack so that gear is easy to find and doesn’t end up at the bottom of the your rucksack.
 |
| THE PARTS |
This config has proved interesting to readers and so a detailed HOW TO is required.
THE PARTS
1 -
GREYMAN TACTICAL RIGID MOLLE PANEL appropriately sized for your project. In my case, 10.75 x 7 as I wanted to organise a large pocket inside my large rucksack -
(You can read more about that HERE )2 - 1/8 inch (4mm)
SHOCK-CORD. I’ve found this to be a good size, it holds stuff in place and isn’t to bulky or twangy.
3 -
CORD LOCKS. Appropriate size and color for your shock-cord and rucksack, in my case; Coyote!
4 -
HEAT SHRINK TUBE. This holds the cords together and makes the thing easer to use, in my opinion.
HOW TO DO
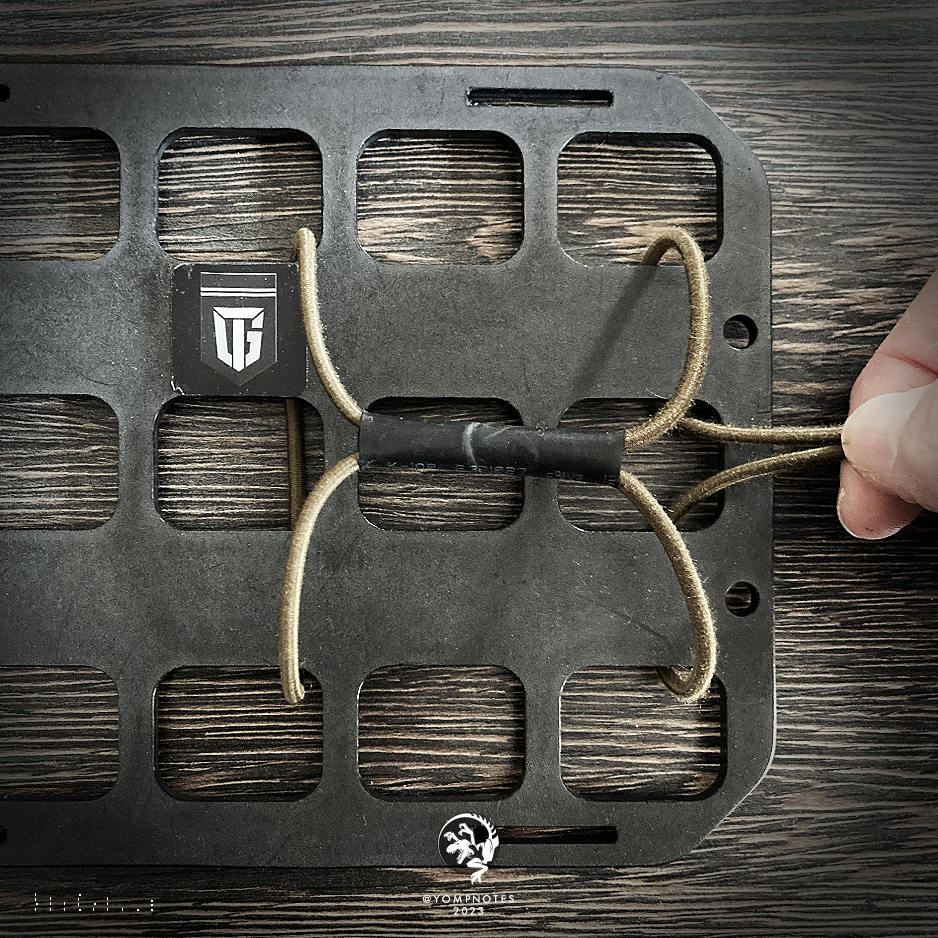
1 - Pass your shock-cord through and under your RMP then bring back through so that both cord ends are to the front of your RMP (Make sure the cord ends are the same length.
 |
| NO 2 and 3 - HEAT SHRINK TUBE CUT TO SIZE |
2 - Cut your your heat shrink tube to about 2 inches long.
3 - Thread the heat shrink tube on to the shock-cord on the front of the RMP.
 |
| NO 4 - READY FOR CORD LOCKS |
4 - Pass the loose ends of the shock-cord back through the RMP then bring back to the front vie the centre MOLLE.
 |
| NO 5 - CORD LOCK FITTED |
5 - Bring the lose end together and fit the cord-lock.
 |
| NO 6.1 TIE A KNOT IN IT |
 |
| NO 6.2 DETAIL - JOB DONE |
6 - Finish off by tying a knot in the cord loose ends so the cord lock can’t be pulled off by accident.
You’re done!
 |
| PROCESS REPEATED |
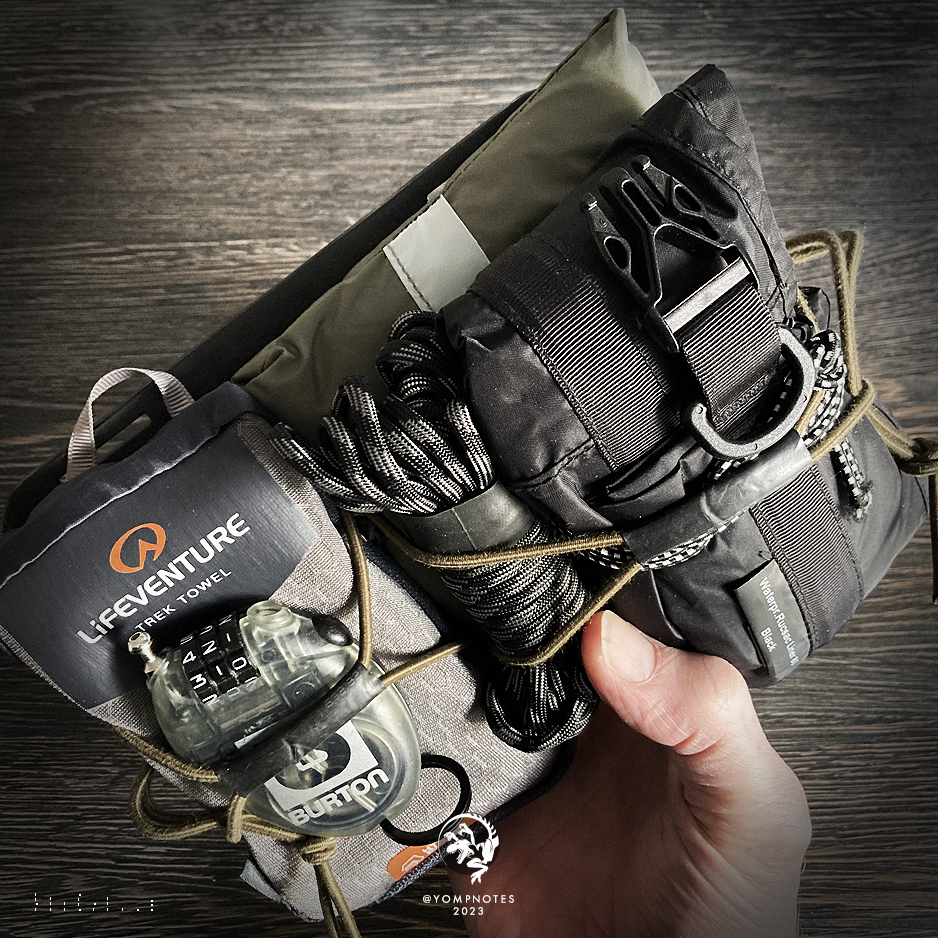
You may want to organise more than one item / items, in that case you can repeat the process, as I have here.
 |
| FULLY LOADED |
As I said earlier, my example here is to organise items I generally carry in a large pocket inside my rucksack but you can use this method for your entire rucksack, hiking, rucking and EDC gear carry. The term; “GAME CHANGER” is used a lot these days but this really is, as it works just as well for your top loader rucksacks as it does for your clamshell.
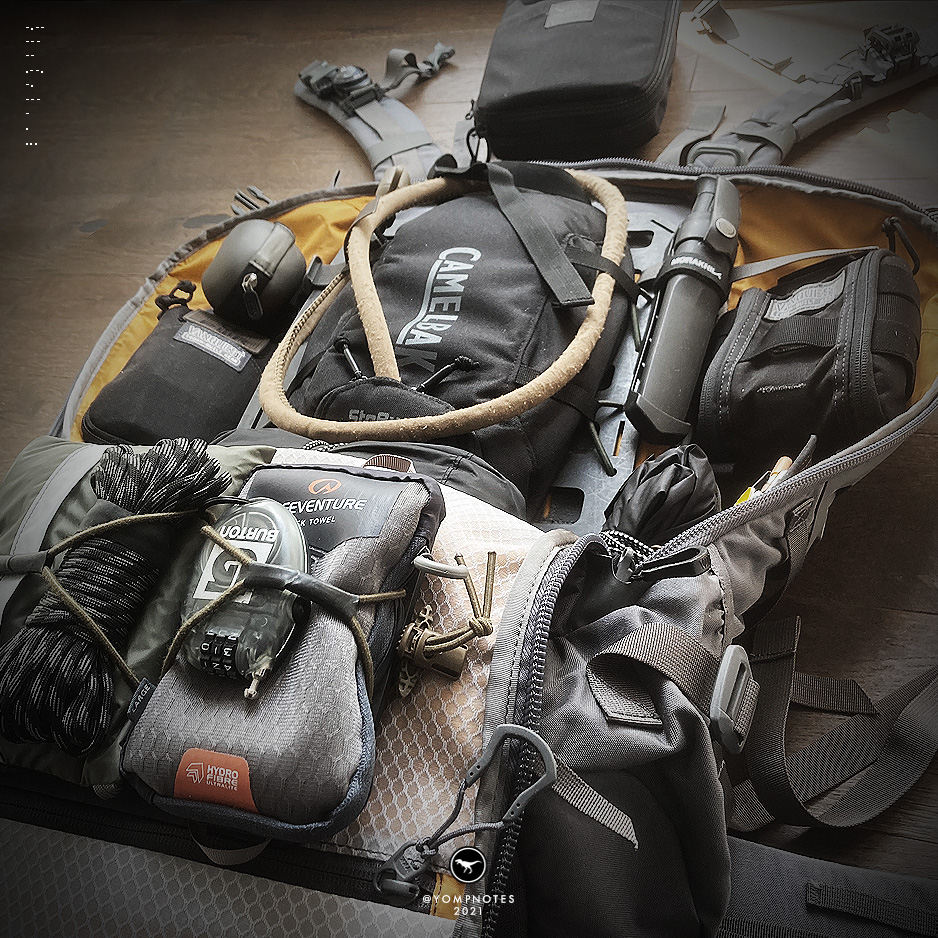 |
| ORGANIZING GEAR I USUALLY CARRY IN A LARGE POCKET INSIDE A RUCKSACK |
 |
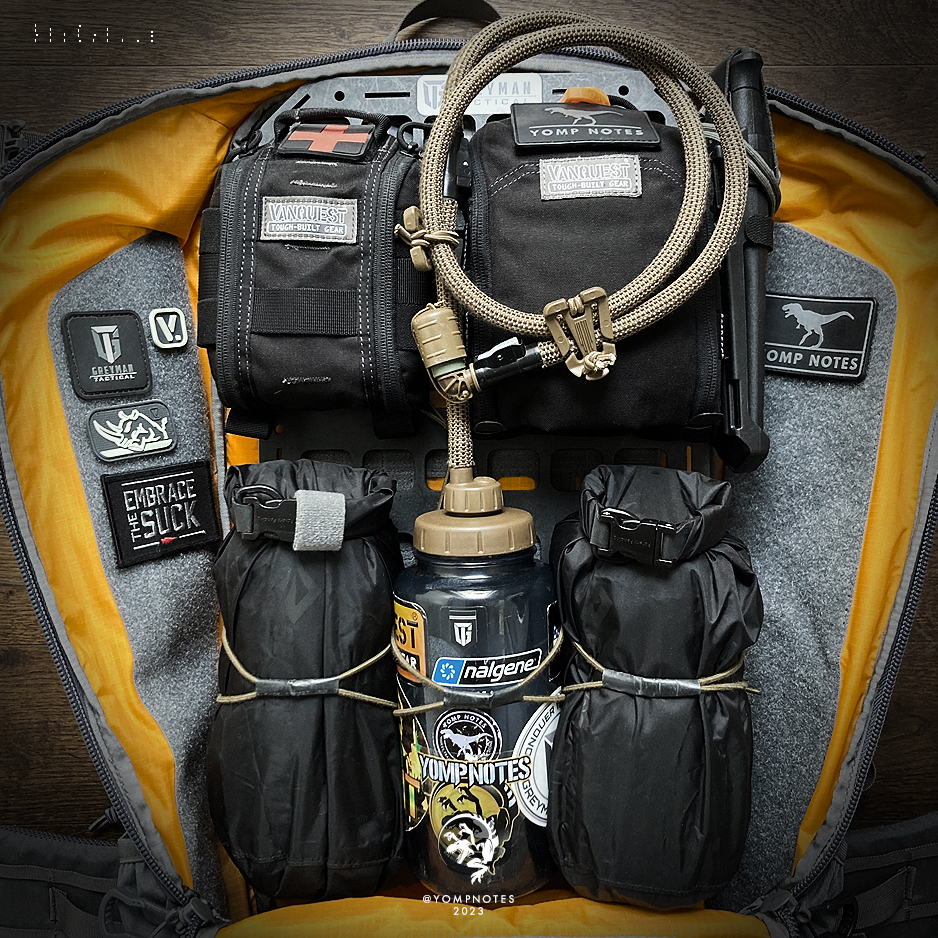
KEEPING WET-WEATHER GEAR AND BREW KIT JUST WHERE I WANT IT
RIGID MOLLE PANEL UNDERNEATH DOING ITS JOB |
 |
| DAY HIKE LAYOUT - IFAK, BREW, O-LAYER JACKET, HYDRATION, O-LAYER PANTS |
If you’ve found this post useful.
It will help to keep the lights on and the computer spinning.
Thank you for your support : )
RELATED LINKS: Find out more tap links below:
[By tapping some of the links below and making a purchase, a small % of that purchase will go toward YOMP NOTES support, at no expense to you. Thank you for your support.]
PARTS LIST
YOMP NOTES //AD


I can't believe the difference that switching to c liquid uk for vaping has made! A wonderful way to relax at the end of a hard day, the rich, delicious clouds are incredibly gratifying. Another great thing is that it's a less obvious alternative to the old ways, which is something I really appreciate. Try it out! You won't regret it!
ReplyDelete